A bubble in a car wrap is usually a five-minute fix: warm the vinyl gently, press the trapped air toward the nearest panel edge with a soft squeegee, and let the film lie flat while it is still warm. Small bubbles flatten in under two minutes. Large or stubborn ones need a tiny pin prick first so the air has somewhere to go.
Before you touch anything, work out what kind of bubble you have. Residual moisture from a wet install shrinks on its own and should be left alone, while trapped air will not move until you push it. Getting that decision wrong is how a free repair turns into a re-wrap.
Everything below assumes a colour vinyl or chrome wrap on body panels. Paint protection film, window tint and interior trim respond differently, and the notes for each are included. Wrapping is a hands-on trade and a shop’s own instructions always beat a general guide like this one.
Table of Contents
- What You Need
- The heat setting matters more than the tool
- Step-by-Step: How to Fix a Bubble in a Car Wrap
- 1. Inspect and mark the bubble
- 2. Clean and protect the area
- 3. Warm the vinyl gently
- 4. Push the air toward an opening to fix a bubble in a car wrap
- The cross-cut method for big bubbles
- 5. Reseal and smooth the repair
- 6. Trim excess film and inspect the finish
- Common Mistakes
- When a Bubble Is Too Large to Repair
- Frequently Asked Questions
- Can I fix a bubble in a car wrap with heat?
- How small should the bubble be for a DIY repair?
- Will removing and reinstalling the vinyl make the bubble disappear?
- What tool is safest for pressing out a car-wrap bubble?
- How long should I wait after fixing a bubble before driving the vehicle?
- Why does the bubble come back after I press it down?
- Conclusion
What You Need
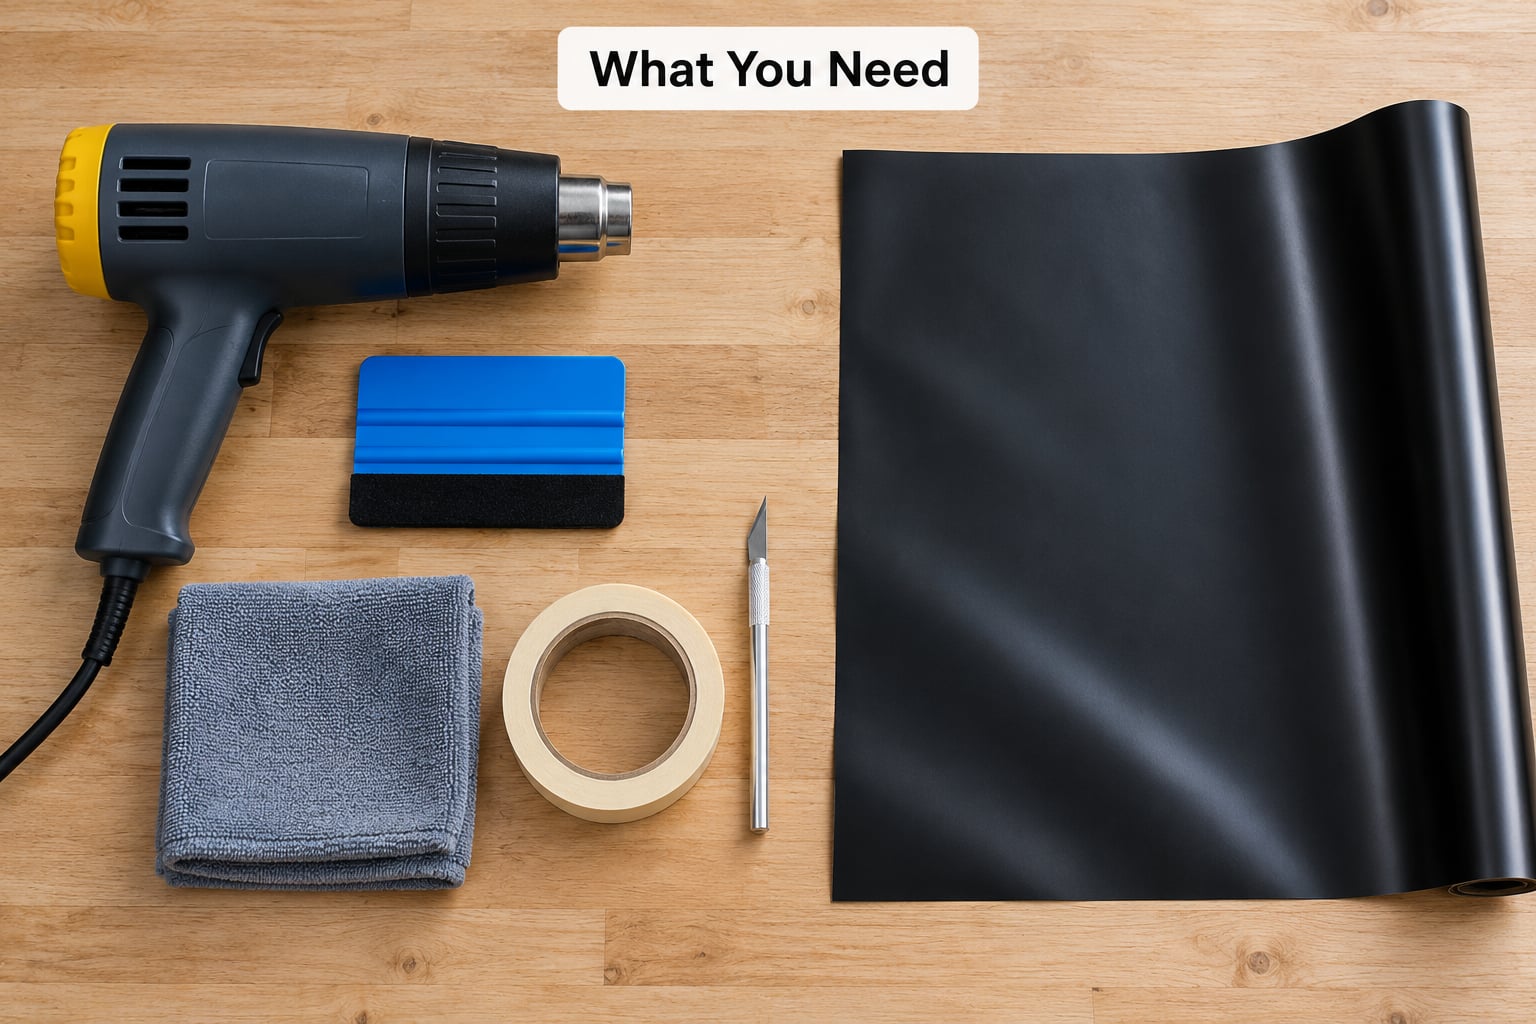
Most of the kit is cheap and most of it you probably already own. What matters is the material of the things that touch the film.
- A heat gun on a low-to-medium setting. A hairdryer works on a small bubble if you have nothing else, but it is weaker and you need to stay closer, which is exactly the risk you are avoiding.
- A soft plastic squeegee or a felt-edge squeegee. Hard plastic or a hard rubber blade will print lines into the adhesive that stay visible for months.
- A clean microfibre cloth to catch any moisture and to check the finish afterward.
- Masking tape if the bubble sits near a paint line, a door handle, a badge, or a trim edge you would rather not protect with a tool.
- A fine pin, needle or air-release pen. This is the one tool that scares people and it is the one that works on stubborn air pockets.
- A plastic card, like an old bank card, for lifting a film edge without gouging the paint.
The heat setting matters more than the tool
Every guide on this topic says “apply heat” and almost none of them give you a number. So here it is: hold the gun 6 to 12 inches from the panel, keep it moving in a slow sweep, and work in passes of 10 to 15 seconds. Never park the nozzle on one spot.
Test on an edge of the panel you are not looking at. If the vinyl dulls, blisters or gives off a sweet plastic smell, you are too close or too hot. Move back and cool down.
A precision blade is not on this list. Razor blades and utility knives are the single most common cause of wrap damage I see, because a slice through a bubble becomes a tear the moment the film is stretched later.
Step-by-Step: How to Fix a Bubble in a Car Wrap
1. Inspect and mark the bubble
Look at the bubble before you heat anything. What you see tells you whether to act at all.
Trapped air looks sharp-edged and hollow, holds its shape, and does not change size over days. Residual moisture looks rounded and slightly domed, can shift when you press gently, and gets smaller on its own as it evaporates through the film’s micro-pores. A dirt bubble has a small dark speck at its centre and will not shrink no matter how long you wait.
A bubble that is shrinking is a moisture bubble. Leave it. Poking a moisture bubble traps the liquid under the film and gives you a worse problem than the one you started with.
Mark the area with small pieces of masking tape on the adjacent paint if the bubble is close to an edge. Do not draw on the film itself; any marker that reaches the vinyl can stain or ghost.
2. Clean and protect the area
The panel needs to be clean and completely dry. If you are fixing a fresh install, the panel was already cleaned and clayed before the film went on, so you are working on a sealed surface, not a bare one.
Wipe the film surface with a damp microfibre cloth, then dry it. Never spray cleaner directly onto the wrap and never let liquid run under an edge. Water that gets behind film sits against paint and can lift adhesive lines that you cannot undo without opening the wrap.
If the bubble is near a door handle, a badge, a fuel flap or a trim clip, lay masking tape over the nearby hard parts before you bring a tool near them. It takes ten seconds and it prevents the kind of scratch people blame on the installer for a year.
3. Warm the vinyl gently
Heat relaxes the film and reactivates the pressure-sensitive adhesive underneath, which is what lets the bubble collapse instead of springing back.
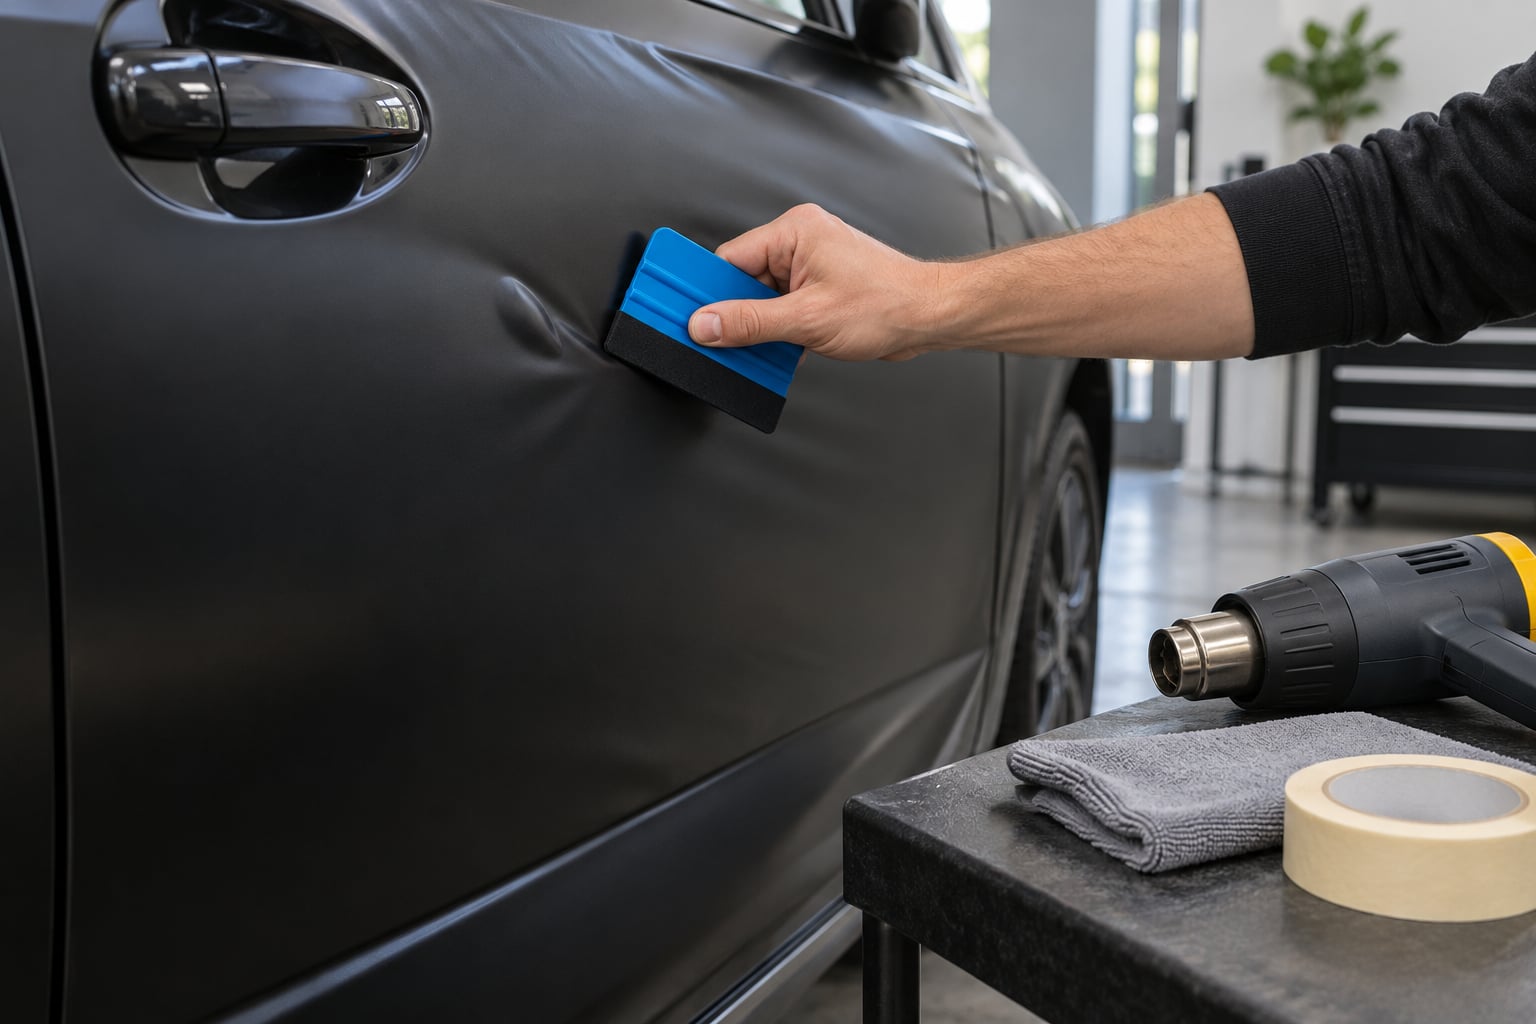
Sweep the heat gun across the bubble and about 4 inches of good film around it, 6 to 12 inches out, on low-to-medium, for 10 to 15 seconds. Then stop and touch the film with the back of a gloved hand or the corner of your squeegee. It should feel warm and slightly tacky, not hot.
Test a spot on an edge panel first if you have never worked with this film before. Cast film and calendered film behave differently under heat, and matte and satin finishes show flaws much faster than gloss.
On a matte or satin wrap, stay at the low setting and shorten your passes. Satin has a soft finish that can polish into a shiny patch under a squeegee, and that gloss shift does not come back out.
4. Push the air toward an opening to fix a bubble in a car wrap
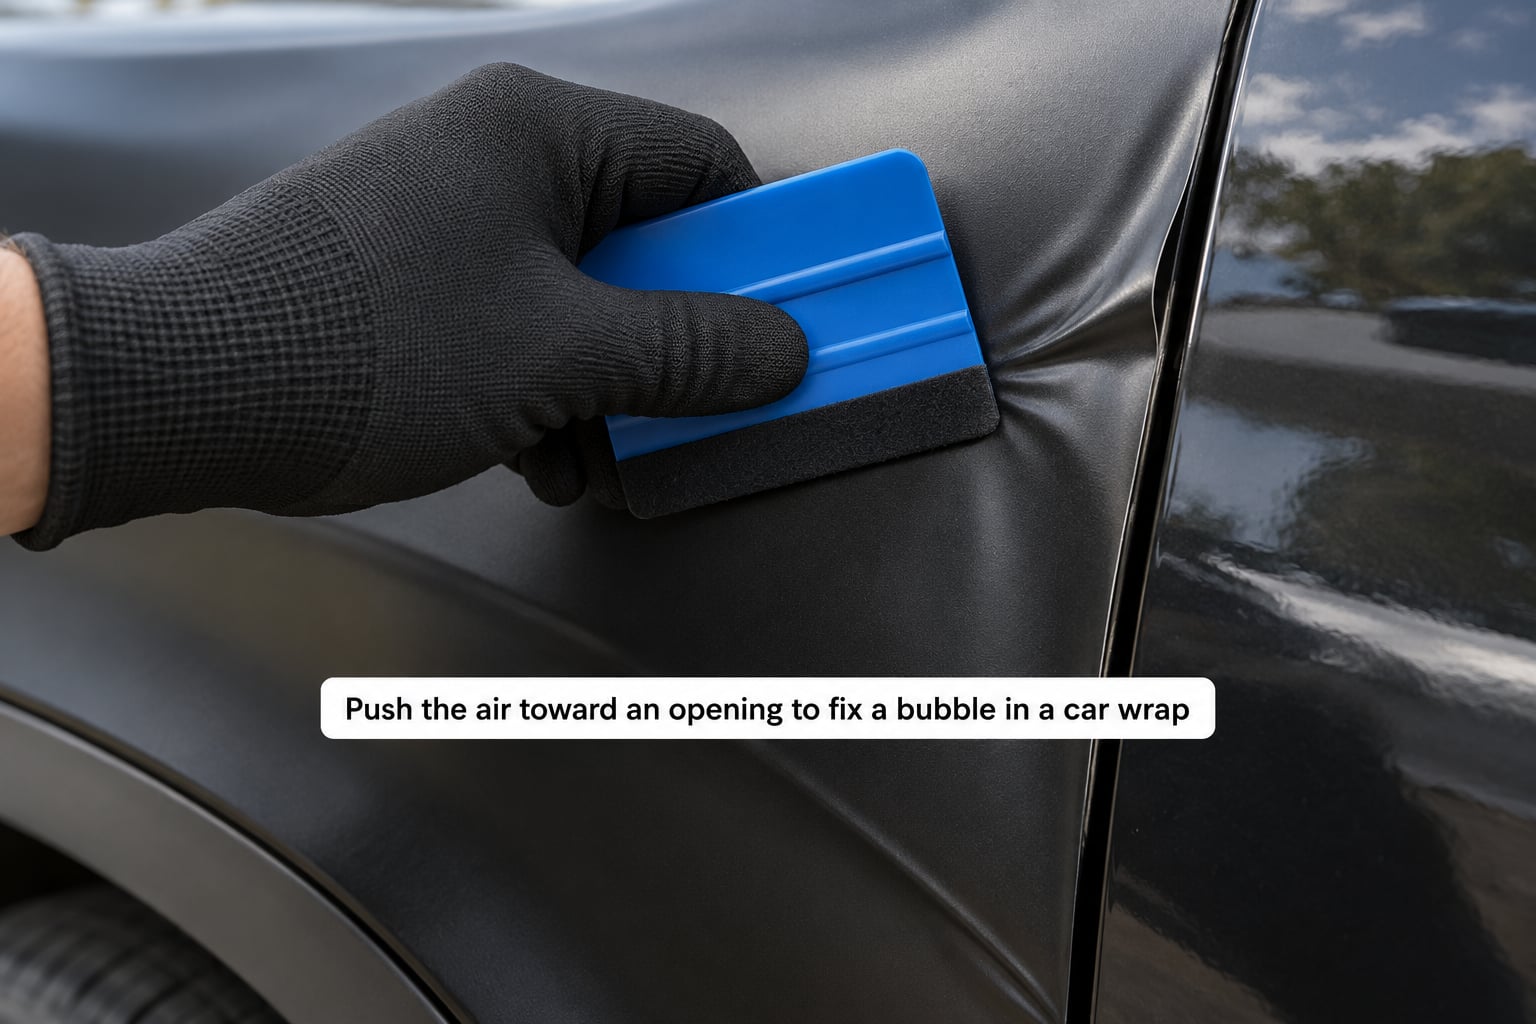
Now flatten it. Start at the far side of the bubble, away from the nearest edge, and press firmly toward that edge with the soft squeegee in overlapping strokes. You are not stabbing at the bubble; you are sweeping air along the panel toward an opening.
Let the squeegee do the work. Drag it, do not push it vertically. A squeegee dragged across film generates its own friction heat, which is why repeated slow passes often flatten a bubble that one hard push will not.
If the air has nowhere to go, give it a path. Lift a film edge with the plastic card, or prick the centre of the bubble with a fine pin held almost flat. The puncture needs to be barely bigger than the air pocket, so the film closes around it as it lies down. A hole made with a blade is a cut, and a cut opens up into a tear the first time the panel flexes.
Many experienced wrappers describe this same sequence: heat the area, prick the bubble, then work it flat with light pressure. It is the standard answer on installer forums for interior trim and recessed areas where there is no edge to chase.
The cross-cut method for big bubbles
A large bubble pushed as one mass tends to over-stretch the film and leave a permanent wrinkle behind it. The fix is to shrink the problem before you move it.
Use the soft face of the squeegee to press a line straight down the centre of the bubble, then a line across it. That splits one large pocket into four smaller ones, and you flatten each of those the same way you flattened the first. This technique comes from the teckwrap installation guides and shows up again in installer forum threads, where the same advice is given: divide the bubble and work it out slowly.
One warning worth knowing about. Modern film has an air-release channel, a micro-channel in the adhesive that lets trapped air bleed out of the film on its own. If you push air out through that channel and the panel edge is not properly sealed, the air can find its way back in and you will be looking at the same bubble next week.
5. Reseal and smooth the repair
Lay the lifted edge back down and work from the centre of the repair outward. Overlapping strokes, consistent pressure, and keep the area warm as you go so the adhesive stays active.
Run the squeegee over the whole repaired zone at least twice more once it looks flat. That last pass is what bonds the edges.
Post-heating is the step people skip. Give the finished repair one more gentle warm pass, gun moving, low-to-medium, and the adhesive finishes setting instead of slowly creeping back out over the following days.
6. Trim excess film and inspect the finish
If the repair involved lifting film, trim back any loose excess vinyl carefully so the panel edge still looks factory-fresh. Cut with a blade held at a shallow angle and pull away from the panel, never toward it.
Step back and look at it in indirect light, not direct sun. What you are checking for is new wrinkles, a lifted edge, an adhesive line where the film was disturbed, and any gloss shift on a satin or matte surface.
Leave the panel alone for a while after that. Give the adhesive several days before a proper wash, and avoid a pressure washer near the repair entirely for the first couple of weeks.
Common Mistakes
Almost every damage report I have seen traces back to one of these.
Overheating the vinyl. Parked heat guns, heat too close, and long slow passes bake the top layer and leave a shiny patch or a permanently soft area. The fix is distance and movement: 6 to 12 inches, gun never still, 10 to 15 seconds per pass.
Using a metal scraper or a hard plastic blade. It prints ridges into the adhesive and those lines stay visible under gloss film. A soft squeegee or a felt edge is the right tool, and pressure is not a substitute for the right material.
Pressing the bubble with your fingers. Your fingerprint oils end up under the adhesive and print shows through clear or gloss film. A wrap glove or a microfibre cloth between your hand and the vinyl avoids it.
Cutting into the bubble. A blade slice looks like a small scratch now and becomes a full tear the first time the panel flexes or the film is heated later. Prick with a fine pin instead, and only when heat and pressure have failed.
Letting cleaner or water under the film. It creeps sideways under pressure-sensitive adhesive and lifts a line you cannot push back down. Wipe the surface, never flood it.
Forcing cold vinyl. In cold weather the film is stiff and pushing hard stretches it into a wrinkle that stays. Warm it properly or wait for a warmer day. The same thing happens if you work a bubble that is not actually an air bubble.
Believing tape fixes it. Tape lifts the surface and can take the top layer with it. If you want to test whether a bubble is air, a strip of tape over a warm spot will flatten it briefly. That is a test, not a repair.
Ignoring bubbles near edges and seams. An edge bubble is not really a bubble, it is the start of an edge lift, and edge lifts travel. Fix them early or take them back to the shop.
When a Bubble Is Too Large to Repair
Some problems are not a technique problem. If you hit any of these, stop poking at it.
The film is lifting along a seam or panel edge. Once adhesive lets go at an edge, the lift spreads along the panel. Re-seating lifted seam film means stretching it back into place, which needs steady hands and usually a second pair of them.
The bubble sits in a concave area. Behind a door handle, in the bowl of a bumper, around a mirror housing, there may be no edge within reach and nowhere for the air to travel. Heat and a card still help, but a stubborn bubble in a recess is a shop job.
There are wrinkles and creases already. Wrinkles mean the film was over-stretched at install. Pushing a bubble around a wrinkle just moves the wrinkle.
The adhesive is contaminated. Wax, sealant, a dirty panel and some polishes will not bond. The film looks stuck and then peels in sheets. No amount of heat fixes a contaminated bond.
The wrap was done by a shop and is still in the touch-up window. Reputable shops normally include a touch-up visit shortly after install, often quoted around ten days. Owners rarely ask, then pay to have the same bubble fixed elsewhere. Use the free route first.
The panel is damaged underneath. Adhesive pulled off paint or a dented panel shows through clear film. That is a body repair before it is a wrap repair.
Your vehicle still has a workmanship warranty. Poking film in the middle of a warranted install can give the shop grounds to decline a claim. It costs nothing to ask.
One forum story worth remembering: a detailer returned a car with a bubble a customer had been living with for a week, and fixed it with a heat gun and a squeegee in about two minutes. Most of what looks like a disaster is a two-minute job with the right material in your hand.
Frequently Asked Questions
Can I fix a bubble in a car wrap with heat?
Yes. Heat softens the vinyl and wakes up the pressure-sensitive adhesive so the film can settle. Hold a heat gun on low-to-medium 6 to 12 inches away, keep it moving in sweeps of 10 to 15 seconds, then press with a soft felt squeegee while the film is still warm. Too much heat or a stationary nozzle can bake the surface and leave a shiny patch that will not come back out.
How small should the bubble be for a DIY repair?
If it is about the size of a coin or smaller and sits on a flat panel, it is well within a safe home repair. Heat it, press it toward the nearest edge, and walk the air out with a soft squeegee. Anything thumb-sized or larger, sitting on a curve, close to a seam, or surrounded by wrinkles, is the point where a shop is the safer call.
Will removing and reinstalling the vinyl make the bubble disappear?
Sometimes, but it is often the step that creates the next problem. Peeling film back to a bubble can stretch and tear it, especially around edges and on tight curves. Only lift film if the bubble sits directly under a lifted edge you can reach. Otherwise heat and pressure resolve most air bubbles without disturbing the original lay of the wrap.
What tool is safest for pressing out a car-wrap bubble?
A soft plastic or felt-edge squeegee, dragged rather than pushed. Hard plastic blades print ridges into the adhesive that stay visible under gloss film. For stubborn air pockets the film is already lifted at, a fine pin or an air-release pen gives the air a path without cutting anything. Never use a razor or utility knife on a bubble.
How long should I wait after fixing a bubble before driving the vehicle?
You can drive straight away, the repair is set as soon as it is cool to the touch. What the repair needs is time before water and hard washing. Wait several days before a normal wash, keep a pressure washer well away for the first couple of weeks, and give the panel one more gentle warm pass after a few days so the adhesive finishes bonding.
Why does the bubble come back after I press it down?
Four usual reasons. The film was pushed harder than it could stretch and it crept back. The adhesive was contaminated with wax, sealant or polish and never bonded. The edge is not sealed, so air pushed out through the air-release channel re-enters through the same path. Or the bubble was trapped moisture, not air, and the liquid is still under the film waiting to dry out.
Conclusion
Start with the smallest bubble on the panel, use low heat with the gun moving, and press with light pressure from a soft plastic squeegee toward the nearest edge. Most air bubbles are gone before you put the tools down.
If the bubble is growing instead of shrinking, sitting next to a lifted seam, hidden in a recess, or on a wrap that came out of a shop within the last few weeks, take it back to the installer. Replacing a damaged panel of film is cheaper than repairing a torn one, and a clean panel of film on good paint beats a stubborn bubble every time.